


dingophil
-
Posts
69 -
Joined
-
Last visited
Content Type
Profiles
Forums
Events
Posts posted by dingophil
-
-
Finished installing McCruise cruise control on my '15. Been looking forward to this pretty much since I bought the bike. Fairly easy install, and the provided instructions are very clear, so no need for a how-to.
-
 3
3
-
-
Well... Fixed it myself. Apparently I just needed to walk away for a minute. For those wondering the answer, gently pull the lower portion of the fairing towards you while turning the clip with a screwdriver. Slips right out!
-
3
-
 1
1
-
-
Looking for advice on how to remove the expansion clips on the lower portion of the inner fairing (pictured). On the ECU removal thread, they use a screwdriver, but I can't figure out how to make that work.. It just spins. I've tried gently prying, but don't want to break it. Any help is appreciated, I'm trying to install the McCruise.

-
Great work on the fabrication! So you just lift the back flap to open the underside storage?
-
Haha that's what I'm trying to avoid.
-
-
$100 is a steal if 1) you like how it feels, and 2) the seat is in good condition.
-
2
-
-
Installed HeliBars handlebar risers, specifically for the FJ-09. I was going to do a "how to", but the instructions were so clear and easy to follow, that I don't think it's necessary.
Took the bike for a spin, and the difference was immediately felt. No more reaching, a much more comfortable riding position, and it felt like I was in even better control than before.

 HeliBars Handlebar Risers Yamaha FJ-09 2015-2017
WWW.REVZILLA.COMMove your bars up and closer to you with a machined aluminum bar...
HeliBars Handlebar Risers Yamaha FJ-09 2015-2017
WWW.REVZILLA.COMMove your bars up and closer to you with a machined aluminum bar...-
5
-
-
Re-rotated the handlebars back. I rolled them forward as a failed experiment in comfort, but looks like I'll invest in some bar risers at some point.
Installed KTM handguards. As many have said, it was incredibly simple. Had to adjust some zip ties, but that's about it.

-
2
-
-
6 hours ago, kmev said:
I purchased these last fall, and they are still available:
 Amazon.com: NEW KTM HANDGUARDS 2015 690 1190 1290 SUPER ADVENTURE ABS ENDURO 6030217910030: Automotive
WWW.AMAZON.COMBuy NEW KTM HANDGUARDS 2015 690 1190 1290 SUPER ADVENTURE ABS ENDURO 6030217910030: Handguards - Amazon.com ✓ FREE DELIVERY possible on eligible purchases
Amazon.com: NEW KTM HANDGUARDS 2015 690 1190 1290 SUPER ADVENTURE ABS ENDURO 6030217910030: Automotive
WWW.AMAZON.COMBuy NEW KTM HANDGUARDS 2015 690 1190 1290 SUPER ADVENTURE ABS ENDURO 6030217910030: Handguards - Amazon.com ✓ FREE DELIVERY possible on eligible purchasesOrder placed. Barkbusters is apparently out of the FJ-09 variant, so I needed an alternative. Does anyone have a link to bar end weights that work with both the bike and handguard? The most promising links early in the thread are old and no longer link to anything. Thanks for the help!
-
Installed Grip Puppies and rotated the handlebar forward to alleviate right wrist awkwardness and hand numbness after about 45 minutes of riding. This put my levers in an extremely awkward position and made the OEM hand guards even more useless. Removed the hand guards and rotated my levers upwards making sure there was adequate clearance, then ordered Barkbusters Storms. Hopefully there won't be a problem on install with the angle of the handlebars.
-
1
-
-
20 hours ago, texscottyd said:
Actually, I’m a few hours east in Houston. East, west, whatever. The Hill Country is to my left...
")
I'll be in Wichita Falls throughout the month of may. Considering bringing the bike, but not sure since the weather there turns nasty in about 10 seconds.
-
Thanks for the excellent write up! Does anyone know if they also allow bar-end weights or sliders to be installed?
-
12 hours ago, tktplz said:
I have this and really like it.
 Original Yamaha FJ-09 MT-09 Tracer 900 GPS Phone Holder, CosmoMotoAccessories
WWW.EBAY.COMThis holder can be installed with any windshield. Very easy to fit! | eBay!
Original Yamaha FJ-09 MT-09 Tracer 900 GPS Phone Holder, CosmoMotoAccessories
WWW.EBAY.COMThis holder can be installed with any windshield. Very easy to fit! | eBay!Mine is a 2015 FJ09. Don't think it fits the new Tracer or Tracer GT. This has worked well for me over the last year.
Just ordered this last night. Long wait for it to ship, but looking forward to it.
-
Took the BRC2 on a cold, wet, nasty day in Phoenix (ironic, i know). Bike performed very well in tight turns, emergency stopping, and agility course. Driver could have been much better, lol.
Also had the opportunity to take my budget Bilt rain gear for its first spin. It works. All in all a good but cold day!
-
2
-
-
I would be interested in anything that was both noise cancelling as well as blue tooth audio capable. Even more so if it's in the form of ear buds that will fit under my helmet. No chord.
-
4 hours ago, BBB said:
Can you not get a pinlock visor for your helmet?
I have a Sedici helmet, and last time I was in Cycle Gear, they had pinlock for other brands, but not their house brand. But you make a good point. I need to do some more research. I appreciate the detailed response, it was exactly what I needed to know.
-
I see a number of folks referencing Nikwax. Is it simply a hydrophobic treatment much like rain-ex, but safe for a visor? Does it have any anti-fog uses if applied to the inside of the visor? I realize the pinlock system is probably best for this, but sadly that's not an option right now.
-
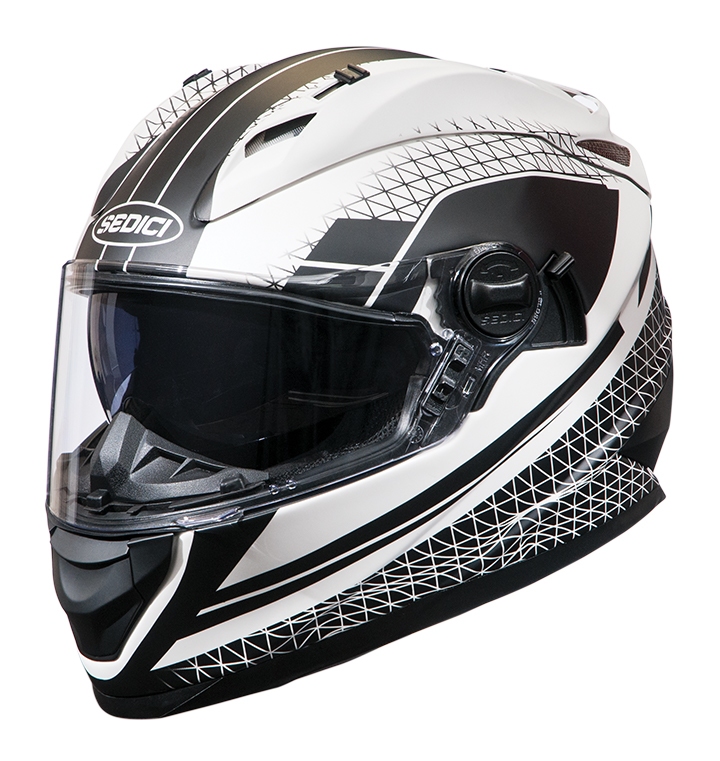
Sedici Strada Opaco. Full face, internal drop down visor. Decent weight, not super quiet, but not overly loud. I'm happy with the performance vs price.
 Sedici Strada Opaco Helmet
WWW.CYCLEGEAR.COMIt does not matter if you ride on the street or the track, the...
Sedici Strada Opaco Helmet
WWW.CYCLEGEAR.COMIt does not matter if you ride on the street or the track, the... -
Great video. Thanks. I subscribed too.
-
Also, today I finished up with my DIY seat debacle. Write-up is in tech tips. Then I adjusted my front pre load to 6mm, and looking forward to my next ride!
-
1
-
-
2 hours ago, piotrek said:
More of a make-work project than a necessity, but useful... rigged my garage door opener to work with 12V power. Already had the opener board embedded in a small project box, but made some space for a tiny 3.3V 300mA voltage regulator, purchased here. Added power supply wires to connect to a switched source (the thing has a 2mA no-load draw). The other set of wires go to a push button switch at side of the bike. The opener fits neatly into the space next to the seat lock assembly.

Been looking for ways to add the garage opener to the bike. Not much of an electrician though. I'm considering mangling a regular car opener somehow, so I can just change the batteries every so often.
-
2/2
Wire cutter and aftermath:


Horrible seat. I gave up. I cut the foam out of the pan, used the wire cutter to clean up, and went back to the drawing board.

Finally, I decided that I need professional help, lol. But I'm stubborn, so I glued the memory foam onto the factory injected foam and closed her back up!

There is definitely tiny bit more give and I'm glad for the memory foam. But if I had to do it all over again, I'd take the sore spots and save up for a proper after market seat.
Thanks for sticking till the end. I hope it was more enjoyable for you guys than "fixing" the seat was for me.
-
5
-
-
(1 of 2) For the past few weeks, I have been toiling away trying to rebuild or fix the standard driver seat, which we're all aware has issues. Mine are that the part your butt actually rests on is maybe 1/2 inch thick, allowing pressure points over time. The other is my inner thighs rubbing the outer portions of the seat cushion. So I set out to make a more comfortable seat, and having watched tons of YouTube videos, began my quest. It did not go well...
I purchased a few items to begin, trying to keep costs below $75 US:
- 3" x 3' x 3' high density foam, foam glue, marine-grade vinyl (ostrich!!), and a 1/4" x 2' x 2' square of memory foam.
I first removed the staples around the under side of the seat, stopping only to wonder what I should do about the piece that locks the seat to the bike. Since there were staples tucked under it.

I snapped the bolt. Must have been some loctite in there or something. No matter, I replaced it with a quick trip to home depot, and $2.07 later I had one 1/4 bolt, a locking nut and a washer.
Next, I traced the seat pan onto the foam leaving extra space at the edge and cut the foam with a bread knife, because I was too cheap to buy an electric knife. Mistake! It took forever and the edges were very ragged. Also, it's extremely imprecise, so fine-tuning your shape is nearly impossible.

Once cut, I glued the single layer onto the pan (above). Mistake! Don't glue anything to the pan unless you're 150% sure it won't need to come off. If you decide to use high density foam, do not use a single layer that goes from the rear to the front of the pan. Use one layer from the rear to the bottom of the "seat horn" (quasi-saddle term), then glue more layers to build up to the height of the front of the pan.
The thing looked awful but if I could make it comfortable, and cover it over, I don't really care.
So the single layer wasn't working out. I could feel every single groove in the seat pan through the foam. It was worse than before, was sitting me up higher, and forcing me farther forward!!!!
I purchased a wire cutter for my drill, as I have no need other than this project for a rotary cutter of any sort. Mistake!! While I could use it to shape the foam, it was unwieldy (read: if you're not careful, you'll catch a finger), untidy, and imprecise.


What did you do to your FJ-tracer-gt today?
in FJ-09 Tracer 900 General Discussions
Posted
I have those and they are great. Hope you enjoy them too!