


Wingnut
-
Posts
19 -
Joined
-
Last visited
Content Type
Profiles
Forums
Events
Posts posted by Wingnut
-
-
Yes, read that in a couple of places too. Easier material to work with to be sure. I grabbed some EMT only because the OD was sooo close and the general procedure is the same. I'm going to chuck my angle grinder in the vise and hand shape the cutouts, five minutes tops.
I traced the OD on a piece of paper, located center of the ID with a compass, straight line through that, protractor to make a 90 deg cross line over that through the center. Placed pipe centered on diagram, marked the intersects with the outside edge, then rotated pipe on center for a 10.8 mm movement in the mark and scribed again. Wallah, four teeth. Now to grind out the space between to a depth of ..oh ... 5 mm.
I'll have to tweak the teeth inward a snooge to make up for the difference in the pipe OD but I think I'm there.
$2 for the pipe. a half hour spritzing the end of the pipe with leftover flat black spray paint (magic marker in toolbox was dry) to make the layout clear, scribe and grind.
Saved about $300. (two tools) I think I'll have steak tomorrow night.
-
 2
2
-
 2
2
-
-
Wow, glad you provided this!
I was in the process of laying one out ... on 1" EMT (karma is real) and WAS kind of wondering about the 1.2mm diff in OD. Now that I've seen yours I think I'm on the right track, going to tweak the teeth inward a noodge. As you said, I might not need the tool, plenty of threads saying just crank down the preload and burp it with an impact. Well, could work, has worked, but my luck I'd spin the cartridge and gall the stanchion.
The Ohlins don't come with a tool, (for the price they should come with condo for a week in Cabo and a date for the dance), I was going to make another tool just for those but I will have the physical cartridge right in front of my nose to measure.
"Take note crowd Piotrek is in the house!"
Thank you!
-
THIS ...is NUTS!
https://www.partsvu.com/damper-rod-holder-90890-01582-00.html
It's a piece of 30mm tubing with notches at one end to engage the cartridge to keep it from turning while torqueing the retainer bolt. It isn't massive, it isn't built to jam into the wheels of an attacking M-1Abrams, it's just to keep a slippery hard-to-reach component from rotating until the bolt bites. Unbelievable usury. Yes, I know that Motion Pro makes one too but it's too short, disappears into the fork stanchion, requires some garage McGyvering to use it.
-
But the NIX 30's have round feet so I guess that kind of parks the concept.
-
I can't find a picture anywhere of an actual stock fork cartridge, much less the foot of one. Not in service manual.
-
46mm socket for the cap. oil level set with slurp tube (motion pro-like thing). It'll all be set before assembly. I've rethunk my original post, the damper rod rotates freely in the damper tube when hot connected to the fork cap, not much help in holding the cartridge from rotating when removing the bottom retainer bolt. Other manufacturers have a slot or groove in the bottom of the fork stanchion that mates with the cartridge foot. So other than aligning and seating the damper tube foot before cranking on the retainer bolt there're no special tools req'd. Since Yamaha offers the tool I'm assuming that design feature isn't present in my fork tubes.
-
Ya, "some kit", pushing a grand 🙄. I'd love to do all my own machine work but I lost most of my years of acquired tools to an ex's lawyer. The cost of replacing all that and STILL doing all the work didn't make sense so opted for a "someone else figured it all out" kit. I get a lot of satisfaction making my own tools, but I can't help but grind the molars a bit when I see obscene prices for little stamped out pieces of crap (I've had that job a few times). Curse of my background.
Hey all, thanks for everything!!
-
1
-
-
You know, I think you're right. I was thinking (not too deeply) that with upper part of the cartridge exposed I could just grab it with a wrench on some flat and crank off the cartridge bottom bolt ... buuut the more I understand the design, the upper part of the assembly 'floats' in the lower half and could just spin on it's own. One Y'allTube video showed the guy just driver impacted that bolt off and removing the cartridge, no cartridge restraining tool in sight. But, in the story of MY life, there's at least a 50% chance that bolt and bottom cartridge assy could be like penguins, married for life, with thread lock.
(*sigh*) ordering the spring compression tool ... or making one. The Ohlins don't need such a tool on their side but, I gotta get the old one out cleanly.
Really? 60 beans for a tube with notches in it? Let me have a large coffee and a few minutes at the bench to see if I can duplicate that puppy. I made the damper pull up extension with a $2 nut from the hardware and a rod I had lying around. Beats $30. Made an oil level tool like the Motion Pro with bench bin surplus.
The purchase of the NIX 30's with springs was hit so I'm taking it back where I can.
-
I'm replacing the stock fork cartridges and springs on my 2019 Tracer with Ohlins. The NIX 30's have their own tool requirements. Question: if I'm essentially "gutting" the innards of the stock Yamaha fork tubes, re-using nothing, do I need to disassemble them? (remove springs using a compression tool) or can I just hold the assembly while removing the bottom cartridge bolt?
This is a one -shot deal so I'm reluctant to spend money on special tools that I'd never need again. I can make my own pull-up tool and cartridge wrench.
-
(Forehead whack) discovered that the PDF'd instructions for the Pit Bull stand says THEY'RE adjustable as well.
-
Thanks fr8dog!
I'm noticing the Woodcraft pin stand is height adjustable:
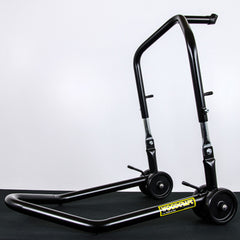
Any advantage or NBD? (Leanin' towards the same price Pitbull as it looks better built but I DO like the bigger wheels on the Woodcraft
-
Boy, caught this amidst a "whata-I-do?" moment.
I was curious just how high a Pitbull triple tree pin lift jack would raise the bike. 'Specially after seeing a video of Moss saying one HAD to have a rear stand if using a front stand:
1:23 timestamp.
-
Or, one could slow down just a nudge for the moment.
I've not modded my forks yet (like EVERYONE else on the planet seems to have 🤕$$) but to set them hard against the one chance that a meteor cratered the road in front of me since last month seems like it would ruin the other 99.9% of the ride and justify the need for rotator cuff surgery after the weekend.
Maybe the OP got caught in the ol' "been this way before so I can let the big dogs run a bit" trap. Gawd knows I can point to a bunch bent metal and spots of hairless skin from when I may have been ten feet tall but no where near bulletproof.
My County leaves me little "surprises" of mounds of poorly packed asphalt when they've patched potholes all the time. No problemo for Joe motorist generally but here comes Clyde Kneeslide around the corner and suddenly it's an WWS "agony-of-defeat" moment begging for a YouTube post.
On a closed track we always had "practice" time, get familiar with the condition of the track before we redlined the health insurance policy, but in the real world EVERYTHING is out to get you, ride safe, ride smart and live to brag over a beer about all the near misses you avoided.
Everyone leaves their mark on the world, don't let yours be in an intersection.
Just sayin'.
-
2
-
-
I'm curious to know if anyone has tried using one of the kazillion aluminum brazing rods brands to repair their sump. A replacement pan dented (oh, a pun) my milk money fund a bit, but I've already ordered it so I'm sitting in the garage thinkin' "ya know ....".
Clearly, if the damage is a shattered pan I wouldn't even try ... well, maybe I would but anyway, in my case the crack is within a dime-sized dent caused by a chucked rock, right in front. Looks like I could easily either leave it and fill it with braze or knock it back out a bit and fill it. Either way $20 worth of rod against the cost of a new pan and the wait for delivery might be an inviting concept.
I've brazed steel and copper before so I have the basic torch chops. Remove (have to do anyway), clean and prep, braze, sand flat and then repaint and brag to friends. No worries about thermal dislocation from goop fixes, solid. There're a bunch of YouTube how-to's for aluminum brazing.
(Or, I could go all Mad Max on it and layer on more aluminum plate ..... guns,...spikes , mmmmaybe not.)
AND I've received an SRC skid pan to ward off future assaults.
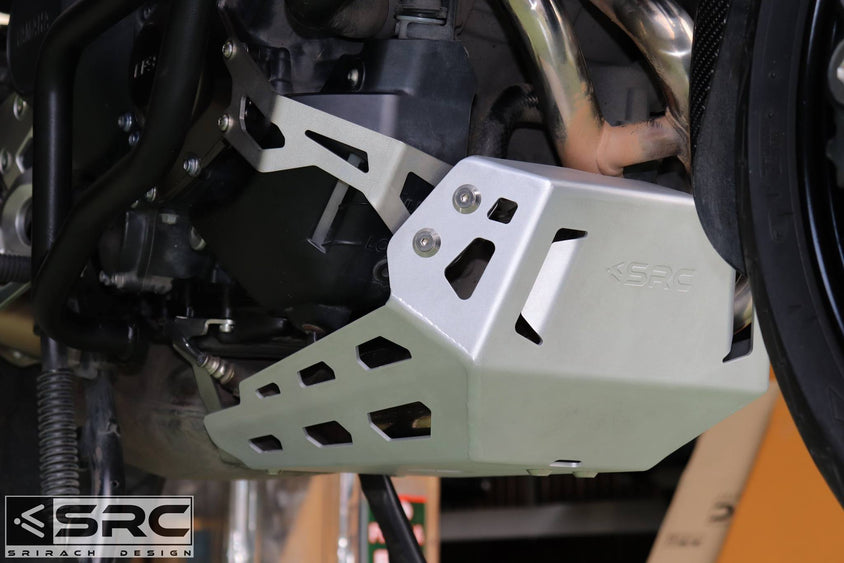
Just like the look of it for myself, not minimalist but doesn't look like a Mad Max vehicle prop either. Could not coax my wallet out of a locked closet for an Higdonion set-up. The SRC is thick welded aluminum, beefy struts ... I could probably lift the bike with it.
Anybody try a repair?
-
2
-
-
Wanting to say I appreciate the effort gathering these part numbers. Went to the garage this a.m. for something and noticed a small oil puddle under the bike. Sump was dry all around the upper edges, drain plug, and oil switch, but I found a small dent in the front side of the pan, likely a gift from the random rock on the road. Cleaned it an warmed up the bike (still plenty of oil). Sure enough, the dent started to weep.
New parts ordered and I will researching a pan shield/skid plate.
Coulda been worse.
On 4/23/2019 at 2:23 PM, foxtrot722 said:This is my first time experiencing this problem, but many others have.
My 2015 with the bottom drain plug finely caught up with me. was getting fuel about 200 mile from home, in the pouring rain, misjudged a little step down, bottom of bike just barley touched, just enough to feel, pulled back under fuel pump area and inspect. After about 2 minutes, saw that one little drop of oil. Rented an U-Haul 5X9 trailer and trailered the bike 200 miles to home. So the good part is, caught it as soon as it happened.
Call the dealer where I purchased the bike, spoke with service Manager and explained the bottom drain design error and Yamaha attempted to correct the problem with a redesigned drain that was located on the side.
Taking that into consideration, would he provide a discount on the parts needed to make the repairs.
After getting pricing, looks like to me the pricing they offered was retail. based that on a Yamaha Parts web site that was offering parts at a 40 % discount. When I added up the web parts cost and added about 40% to it, it was near what the dealer quoted me.
Needless to say, I was a little miffed that the dealer didn't appear to offer any discount. The next time I am close by, I'll stop in and ask to speak to the Dealer Manager, only fair to let him know they have lost a customer and I won't rely on them for new bike sales, parts, or service.
I was aware of the Mazda mod, but felt consider I ride solo and am cautious about clearance, I could avoid hitting something. Which was not the case. Remember, the bump was so light, I barely felt it.
For those of you that might want to switch to a side drain pan, below is a part list I ordered. The online part number page showed the new part # for the pan and also a new part # for the 15 screws to mount. I was not able to tell if the screws for the new pan was longer or shorter, so I ordered them also.
This leads to a question, was looking a the two skid pans Twisted Throttle offers, just don't really like the look, but not sure if there are any better choices. Anyone have any suggestions?
. .Gasket
Item #214-11198-01-00 $1.60 3 $4.80Gasket, Exhaust Pipe
Item #4FM-14613-00-00 $5.15 3 $15.45Element Assy, Oil Cleaner
Options: Old Sku: 5GH-13440-50-00
Item #5GH-13440-60-00 $8.08 1 $8.08. .O-Ring
Item #5VY-8A8E0-00-00 $4.42 2 $8.84. Plug, Straight Screw
Item #90340-14132-00 $5.88 1 $5.88Bolt, Hexagon Socket Head
Options: Old Sku: 91312-06025-00
Item #91317-06025-00 $1.90 15 $28.50Strainer Cover Assy
Options: Old Sku: 1RC-13400-00-00
Item #B56-13400-10-00 $131.45 1 $131.45Gasket, Strainer Cover
Options: Old Sku: 1RC-13414-00-00
Item #BD5-13414-00-00 $11.74 1 $11.74
Subtotal: $214.74
Shipping: $23.49
Salestax: $0.00
Order Total: $238.23-
1
-
-
Thank you!! You're awesome to comment so quickly.
I've edited the post (thought I did anyway) to reflect my discovery that the "C YA" driveway warranty statement applied to Penske's racing shock line. I'll assume there's a year "til-death-do-us-part" promise for them ... same as everyone else though I can't find the ink from Penske to prove it.
Went the Ohlins route, partly because of the longer warranty, partly because the Penske install pics/vids I saw mentioned cutting the side plastics to fit around the reservoir ... and a flippin' HOSE clamp to mount the reservoir?
Many of those posts are more than four years old so that may not be the case anymore, still ... it was the info I had.
You're better than most to stay on top of your maintenance like that, I get loose stuff handed to me in a greasy baggie with a note that says "don't work, can U fix? (smiley face, smiley face).
There's a Celtic proportion of my gut that's sayin' "The Ohlins ain't gonna be as easy to service as the Penske's" but hell, I'm buckin' my age demographic even riding a motorcycle, a three shot Grande Mocha can't touch a knee drag corner on the way CVS to make the bladder shrink.
Forks are next ... soon as I mentally pay off this upgrade with a few "yeehaaaaws, she be on a rail now!!" rides.
Thanks again.
-
1
-
-
Curious about opinions concerning warranties on high end (as opposed to stock) shocks.
A little searching surprised me. Ohlins have a minimum two-year warranty on their motorcycle shocks, K-Tech, one year, cannot find a warranty statement for Penske.
Are the higher cost Ohlins (S46HR1C1S)worth the longer warranty?


Necessary tools to work on your FJ or Tracer
in FJ-09 Tech Tips/How to's
Posted · Edited by Wingnut
Re: seals and bushings, the bike has 1225 miles on it, bought it with 950. It's been garaged it's whole life. I'll clean 'em and grease the tube slightly for stiction:
but I'm sure they're in pretty good shape.