


iamthedruman
-
Posts
56 -
Joined
-
Last visited
Content Type
Profiles
Forums
Events
Posts posted by iamthedruman
-
-
Double check your yellow connection. According to the instructions, the harness-side is as follows:
RED*= + 12V (switched); BLUE= Brake Light wire; GREEN= Right Turn Signal wire; YELLOW= Left Turn Signal wire; BLACK= Ground.
Here is the wiring schematic from the 2015 FJ-09 (mine) which may or may not be of use to you.
It looks as though the connections should be, in order harness to bike:
Harness to bike
blue to yellow ,
black to black,
red to brown,
green to dark green,
yellow to dark brown
Hope this helps.

-
Hey there,
Haven't installed the exact kit you mention but I have installed 2 Admore kits on my last two bikes. They were older models and the instructions were spot on. Did you receive good directions or are you figuring out the wiring as you go? I find the taps they include need to be screwed down as tight as they will go in order to maintain a good connection.
Hope this helps.
-
Have not done either upgrade but was a long-time VFR owner and Daugherty suspension upgrades were HIGHLY regarded on VFRDiscussion.com. Was considering pulling the trigger and he was very responsive via email on the options he could do as well as his suggestions for fork oil weight, settings, etc.
-
 1
1
-
-
Ottawa, Ontario, Canada (Richmond)
-
Just now, piotrek said:
Absolutely... works like a charm. The cable lifts a bit when I turn the throttle. WOT is just about 1/4 turn anyway.
Very good! 😀 I've noticed, as @Duke mentioned, there's some uneven heat but they do get nice n' toasty.
-
1
-
-
1 hour ago, piotrek said:
Heat Demon pads installed. I may regret this cable routing option (no drip loop), but it seems to work very well otherwise.

Do you have enough slack to twist the throttle without binding?
-
5 hours ago, piotrek said:
It all helps... thank you. Received the heating pads (both the same, unlabelled... and solder points exposed 🤔) and the Pro Grips 719. Fussing a bit over which adhesive to use. Used J-B Weld with the Oxfords... but might try something less permanent this time 😜.

I used hairspray. Nice n' toight but still removable. 😎
-
1
-
-
-
On 12/2/2019 at 12:21 AM, piotrek said:
Okay... thanks. I can figure out the 'where' part (had Oxfords before the bar change)... just wanted to see some reference photos of the finished installation, if convenient of course. Cheers.
Here's a couple images of throttle-side. Sorry I couldn't get the clutch side as it's tucked against a wall. The heating elements are placed along where your palms will rest. There's plenty of wire to route the exits however you like. Clutch-side, there is a conduit pre-formed into the bottom of the switch-gear for the OEM grip heaters. I used that for my wires and it fit perfectly.
Hope this helps
-
 1
1
-
-
21 hours ago, piotrek said:
Could you snap a pic showing how the cable exits the grip on the throttle side?
As @fj09viking said, you have some options. I will try to get some pics for you but she's under a cover sleeping the start of winter away at the moment. 😭 I think mine exits around the 4 o'clock position also (possibly 5 o'clock...)
-
It's shorter than the grips. I centred mine and had approx half an inch from both ends.
-
1
-
-
Bah! Whoops, I meant the Heat Demons. I used the set indicated in the other thread. My bad. Just a free user so can't edit it any further.
😋
-
1
-
-
If you're ever up north in the Ottawa-area, one of our go-to routes is the 511 Highway about an hour outside of town in a village called Calabogie. Great little diner called the Redneck Bistro which serves the local Calabogie Brewery offerings. This ride is known as the 'Calabogie Boogey'. Looking forward to getting out on it with the FJ!

You can read more about it here:
-
On 10/28/2019 at 8:05 PM, fj09viking said:
Had a chance to ride with some lighter, thinner gloves and the uneven heat is definitely noticeable, but not enough for me to consider it an issue. Besides, my throttle hand tends to get colder than my clutch hand anyway so it all works out!
Seconding @fj09viking. I set mine up over the weekend and the instructions in this thread worked like a charm. Purchased the Heat Demon 210019RR set and some Fleabay Yammy turn signal connectors to wire things up (hint: if you use the ones I did, the turn signal connector is the BLACK wire on both to connect to the correct bike-side connectors on the 2015MY). Gives access to the OEM menu system to run the grips and a finished OEM appearance. Grips are a little uneven clutch-side due to the missing insulation (only used the heatshrink) but they sure do get HOT! Dialed back the settings to 3/5/7 and things were nice n' toasty on my test-ride at around 5 degrees C.
-
1
-
-
Just installed my Hotgrips using @Duke's method. Worked like a charm. Took'er out for the last pre-winter sleep spin around 5ish Celcius degrees yesterday with the grips set to 3/7/10... 10 heated things up right quick! Will be readjusting next spring to 3/5/7 as others have mentioned!
-
1
-
-
3 minutes ago, fj09viking said:
Sounds correct, except I had no blue/yellow wire, it is red/yellow. Duke also kindly posted written instructions in the 1st post on page 3 of this thread in case you did not see it.
Thanks for the look-see! Maybe @Duke will be able to update the post to collate all the relevant information into the first post. Or maybe someone else will write up a new version with pics. 😉
-
On 4/21/2019 at 9:21 PM, Duke said:
So, here is my very simple wiring diagram for the final product. The wire colors are representative of the grip heating elements (red, white, and blue), the positive from the bike (Yellow/Blue), and the ground from the bike (black). As you can see, you connect the white wires from both heating elements to the yellow/blue wire from the bike, and then you connect the red and blue wires from both heating elements to the ground from the bike.

Living here in the great white north, it gets cold, damn cold. Heated grips are a must but there's no way I'm spending $400 CAD on heated grips. I like your idea of the Heat Demons (I've put them on a few bikes too and had good luck) so Duke, if I understand your logic, you purchased a couple of bullet-style connectors also and worked as follows:
Spliced the white wires from both grips together.
Connected them to the bullet connector (black) bike-side with the blue-yellow wire.
Spliced the red and blue wires from both grips together.
Connected those to the bullet connector (grey) bike-side with the black wire.
Am I following the logic?
Thanks!
-
20 hours ago, betoney said:
I'll take your word for it, I was just going by the bikes listed specs.
Specs at a Glance
Buell Ulysses XB12X
Displacement: 1203cc
Seat Height: 2006 33.1 inches; 2007 31.8 inches
Fuel Capacity: 4.4 gallons
Dry Weight: 425 pounds
Colors: Barricade Orange, Black
Price: $11,495Interesting. I'd say the seat heights are inaccurate but the rest are pretty close. Funny though, after googling a bunch, the height you specced comes up frequently but for Cycle Ergo and my own butt experience (I took over the Uly from a VFR800, 2002 and it's around a 32 inch seat height).
-
16 hours ago, Dodgy Knees said:
Two very different bikes...I had a Ully and yes, very tall, one foot down for me 5.10. Good fun but a bit too much character for me, stranded on the side of the road once too often.
The Tracer is a modern reliable bike that can be relied on. Far superior in all areas, except maybe character. 🤔🤔

Well said. Lotsa character. Gobs of torque. I've been stranded a couple of times now and the wifey said enough's enough. Here's mine, up for sale at the moment:

-
16 hours ago, TheBigG said:
Congrats!
A very nice bike with a very nice colour.
That windshield though.....I bet it is mega effective.
It's my beaver tail... 😅😅😅
-
No. Not even close. Ulysses is an XB12X. Maybe you're thinking the XT, which is about the same height as an FJ. Think an extra 2.5 inches. I can flat-foot the FJ (seat in the low position, love it!) whereas on the Uly, I'm on my tiptoes and even then, need to lean the bike which is an uncomfortable sensation on a 550+ lb bike. I really appreciate the lesser weight, narrower profile, and lower seat!
-
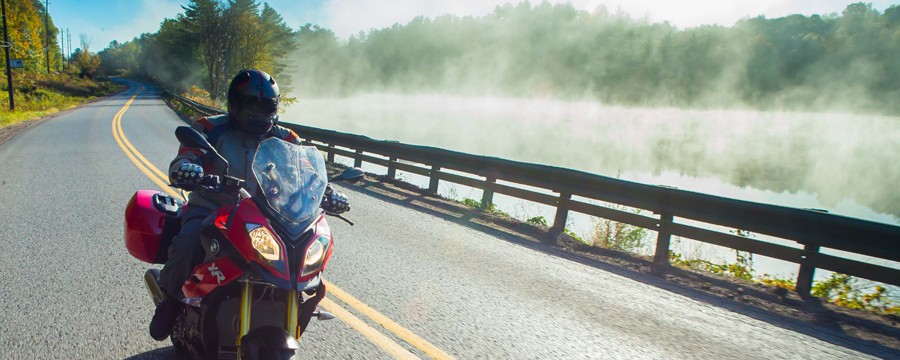
After lusting for an FJ-09 over the last several years, I finally picked up a low-mileage 2015 in Deep Red Metallic with 8,000 km. Came with the hard bags and touring screen.
It's replacing a 2008 Buell Ulysses which is just too tall for me (I'm 5'8" and I just can't flat-foot it) plus finding replacement parts is becoming challenging.
Here are a few pics of 'Garnet' with his little sister, Ruby (wifey's bike):


-
4
-
 1
1
-


Installing Admore Light Kit for Givi V46 Top Box
in FJ-09 Tech Questions
Posted
Is it working correctly now?