


2and3cylinders
-
Posts
4,413 -
Joined
-
Last visited
-
Days Won
86
Content Type
Profiles
Forums
Events
Posts posted by 2and3cylinders
-
-
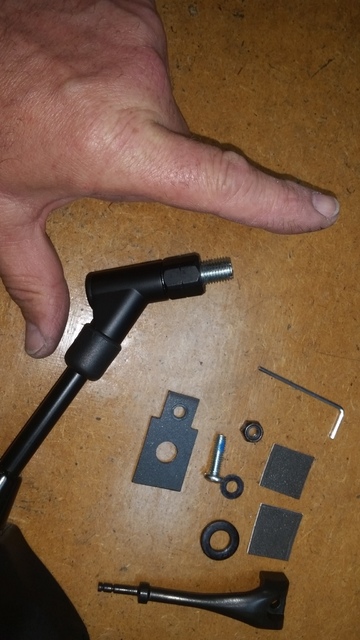
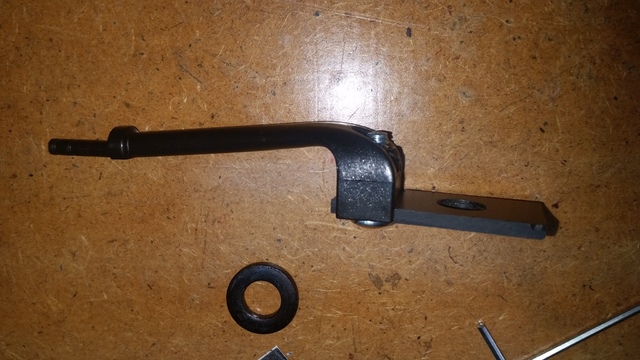
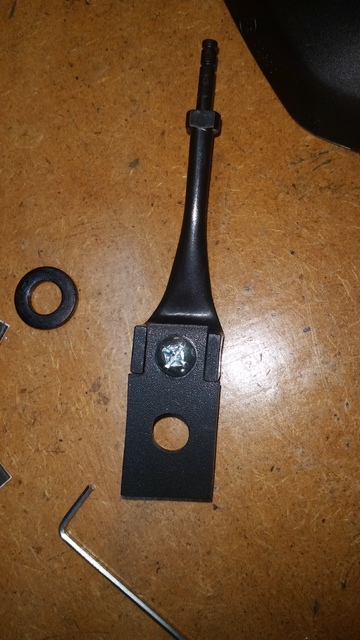
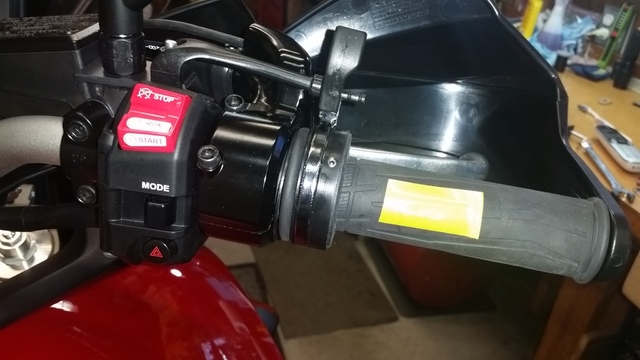
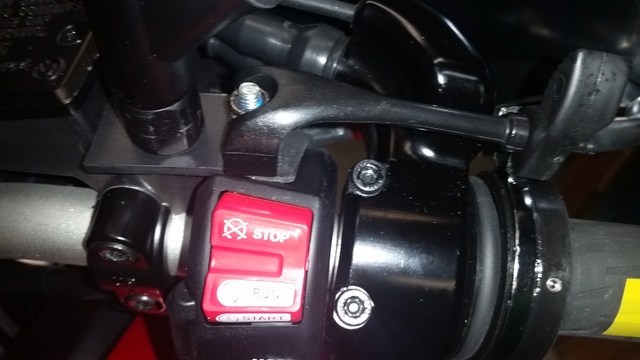
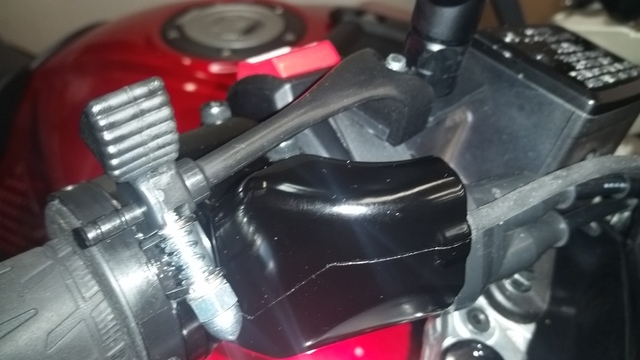
I'm interested in seeing some additional close up photos and reading a description of how you installed the SOP standard Vista Cruise throttle lock I spied in your above pics; if in fact that is the make and model, or is it another manufacturer? It appears you installed it down at 6 O'Clock rather than the 8 O'Clock (or higher) position as prescribed in the instructions. Is that was because of the need to install the screw to keep it from rotating so it did not interfer with throttle function? I currently am running the Universal Vista Cruise Model # MCUVOO (http://www.soundoffrec.com/products/cruise.aspx?#MCUVYC) because I could not fit the standard Vista Cruise between the inboard end of the right hand grip and the outboard side of the throttle housing with the OEM heated grips (I didnot want to chance trimming the outboard end of the throttle grip so it could be moved away from the throttle housing). I had to fabricate a plastic retention connector to fix the Universal Vista Cruise's stationing arm because of the required immediate adjacency of the mirror to the throttle house which precluded use of the provided bar clamp (See below photos). My install works satisfactorily but I'd like a simpler configuration with less parts that can shift and/or fail.Got a tap in the mail today from my new friend Bob and ten minutes later I'm installing the OEM aluminum caps and some black Delrin bar ends I made. That tap handle is over 40 years old. I made it in high school!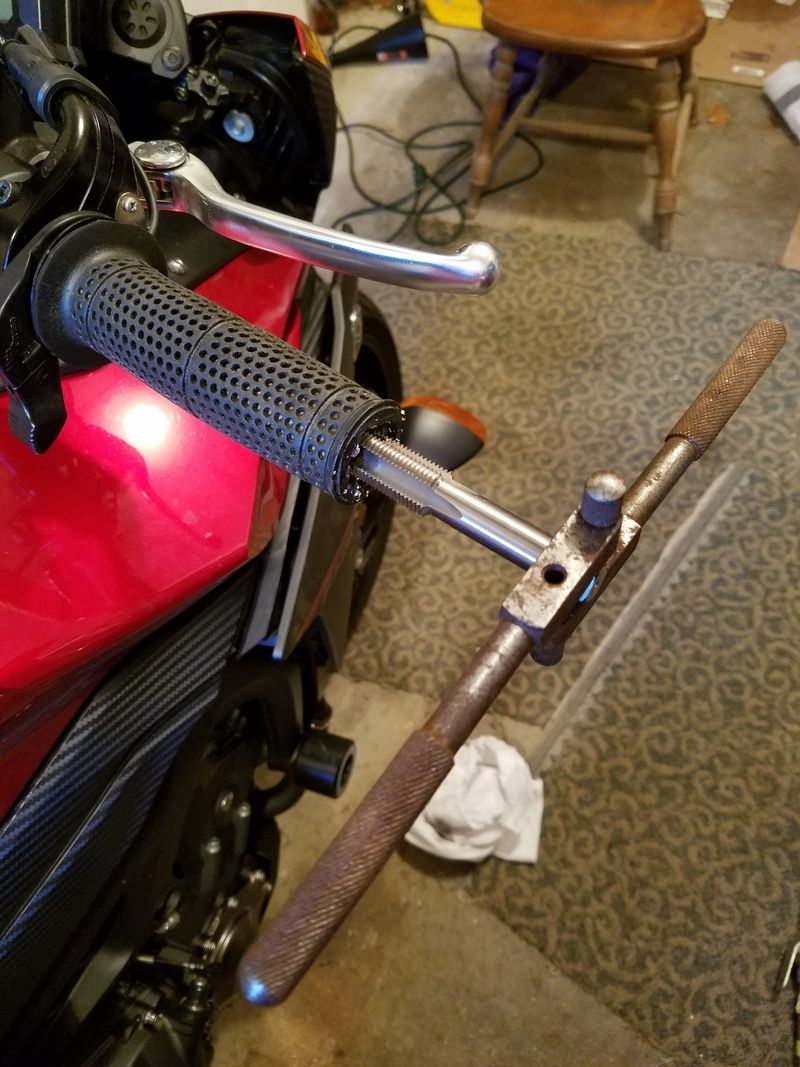
-
I can understand removing the indexing pin from the left control pod (given you state it still clamps "tightly") but what about the throttle housing pod? It would seem very "problematic" if the throttle housing rotated on the bars even a very small amount.
Easiest to just file off part of the plastic alignment pegs. That will hold the controls tightly and still let you adjust things where you want them after the bars are mounted.did you have to drill location holes into the Renthal for mounting the switch housings? I'm really interested in doing this swap
Thx
-
KTM also with R&G bar ends (which are not heavy enough IMO) and bars filled with BBs. Very acceptable damping vibration now and the OEM heated grips keep me toasty down to 40F at 70 mph in my next to warmest Cortech Hydro GT gloves (the warmest are Warm N' Safe electric not needed on FJ-09).
-
When the time comes to replace my sprockets and chain, I'm going to a 520 16-45 setup, with a 110 link chain. Should loose a few pounds also. And, to the naysayers, I did this conversion on my DL1000 V Strom, and it worked a treat. No adverse wear issues at all, and a noticeable acceleration improvement. https://www.drivesystemsusa.com/superlite-rs-series-sprockets/yamaha/street/fz-09-14-15/
2and3cylinders said:
I've run DID ZXVM 520 on my very comparable power output (+ 2 HP & 10 FP) VTR and they last about 5,000 miles less (only 18~20k miles) than the otherwise identical DID 530 and that's with fairly careful maintenance and a Scott Oiler(BTW, I also always run steel sprockets F&R, yet to try a SuperSprox rear). Yes less unsprung weight and faster spin up (less rotational mass) but NOT really THAT noticeable.
-
This has been discussed before. Going from OEM 16/45 to 15/45 = 6.6% change "lowering" gearing (higher numerically). Going to 16/47 is a bit less at 4.36% change "lowering" gearing (not as high numerically). 16/49 = 8.88% change "lower". A 15 tooth CS sprocket stresses the chain due to the smaller radius it must follow more than a 16T and of course stepping up in the rear has no negative effect on the chain but it would need to be determined if a larger rear sprocket is available (and keep the OWM 16T front with its damper but I've never heard a whine going to an AM CS sprocket as mentioned on other motorbikes in the last 40 years but I guess it's possible) and at what size larger tooth sprocket a longer chain would be required. I doubt a 47T would be an issue. On the other hand, a smaller front may run the chain out of adjustment (at least with the OEM adjusters and has anyone tried one of the AM adjuster assemblies?) when it wears (there's no such thing as chain stretch) down the road (pun intended).
-
The SH46 holds 2 Lg helmets or 1 XL & 1 Med and its interior shape is optimum IMOI have the 36/48 Combo. I keep the side cases on all the time (can't lane split here) and just to the top box for touring or long trips with the Ms. (to use the backrest)
I like the 48 because it fits two helmets, so on 2-up day rides we each enough room to leave all our gear with the bike when we stop somewhere. Also it's (just) big enough to fit a standard size 4 person tent, and sleeping bag, air mattress, pillow.
http://www.shadonline.com/SHAD-SH46-TOP-CASE-p/d0b4600.htm
-
I recommend the SH36 side cases and the tweener SH46 top case (which the lock set provided with the SH36 also fits). Get the Shad FJ-09 top case mount kit that I believe fits all their top cases (See below). When you install the side case and top case mounts, only one of the sets of spacers are required.
-
I prefer the deceleration resistance afforded by the FJ-09 clutch system and do not think I'd like the free-wheeling effect a slipper pack will provide. I'm used to big sporting 90 degree V-Twins and with only a 1 pound lightened flywheel my VTR1000F will put you on your nose if you are not careful letting out the clutch and matching wheel speed to engine revs. The FJ-09 with its 3 little cylinders can take quite a bit of over rev and wheel speed differential under decel without squeaking the rear doughnut or braking traction, and I have never noticed the traction control kicking in (is it that smooth?). Now I would love reduced lever effort but not for the trade off. I've read a Bolt clutch actuating arm will fit right up and reduce lever pull but at the expense of I believe less lever travel; i.e., a narrower actuation window (range). Anyone try this?
I would not call my FJ-09s shifting anywhere close to "butter smooth", it's a bit notchy and was quite reluctant to go into neutral at a stop. I've gotten used to shifting the beasty and learned to keep the clutch lever adjusted as tight as possible with the bars to the left (when the cable is at it's tightest). Before I started adjusting all but the minimum amount of slack out of the clutch cable, and when it had under say 4,000 miles, getting it to go into neutral at a stop was neigh impossible and very frustrating, even trying to snick it in when rolling to a stop was like rolling craps. Now it's much, much better with over 9,000 miles since new last July, and I have gotten the hang of when and how to shift my FJ-09 but it's no where near as slick shifting as say my 1997 VTR1000F, and it has 106,000+ miles on it's clock.
-
I don't really have an issue with Torx drive but I like having commonality of fastener removal/installation tools; i.e., I went with the Mazda plug as it uses socket head hex drive (Allen wrench) like most of the other exposed fasteners on the FJ-09.
-
I installed the Kev O2 controller so I think that dropped my mpg but even before the O2 controller I never got over 45 actual mpg (i.e., not per the meter display), and now if I take it easy (usually in Mode A as with Kev's O2 unit it is finally very manageable and Standard now in comparison seems flat) only average 41 to 43 mpg, 45 max, on our crappy E10 91 octane.
BTW, run an ounce per gallon of Chevron Techron Plus Concentrate every 4th tank full if you have to run E10.
Any other fuel additive including Sea Foam is basically snake oil or as with Sea Foam just refined oil and hydrocarbon solvents that shock carbon loose when it ignites on super hot combustion chamber particulates, not really a good thing as they can become fused to the valve mating surfaces. Techron actually cleans the valves, intake and exhaust tracks and the combustion chamber.
-
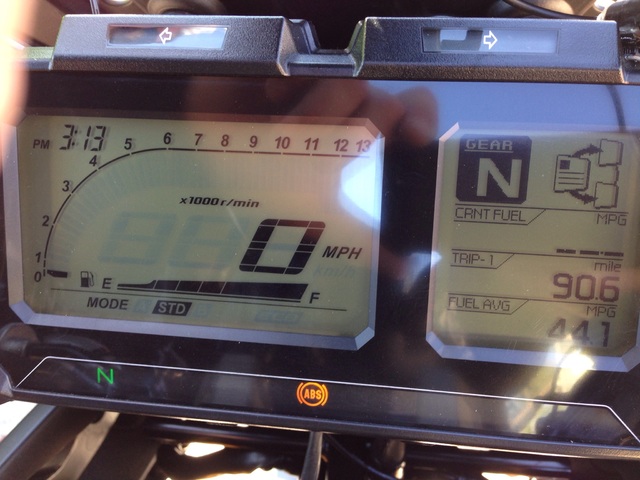
My new in July 2016 Red 2015 FJ-09 averages about 41 ~ 43 mpg on our crappy 91 octane E10 fuel and the gas gauge was fairly accurate and ran down normally until recently (at about 5,300 miles) when it started sticking on full until about 105 miles then suddenly dropping to half full where it should be approximately. This has occurred over the last 4 or so fill ups except for one when I filled up and the gauge was stuck at about half way then suddenly went to full and then did the usual stick until 105 miles thing. Weird. I've run as far as 21 miles on the blinking empty light count-down and get about 2 mpg less than the mpg indicated.
-
Did you pay $225 and can it be donned and taken off with eyeglasses on? It says it has "Eyeglass Friendly Cheek Pads" but that could be once it's on.I just picked up a Kabuto Ibuki in red... I've had a Bell RS1 for a few years and now that I got the FJ, I felt I needed something more sport touring minded. These have often been compared to the shoei in fit and finish. Got it from motorcycle closeout at an amazing price... Plus the red matches almost perfect to the fastest FJ color (red). Here's a video review
Also, how is the fit, true to size, round, semi-round, long oval, medium oval (Shoei now makes different helmets for different head shapes, so saying it fits like a Shoei...)?
http://www.motorcyclecloseouts.com/sport/modular+helmets/kabuto_ibuki+modular+helmet
-
I've been wearing flip-fronts for many years from the original HJC Symax to my current Gmax 54S and Nolan N90, both of which are getting a bit long in the tooth. I've tried on the new and old Scorpion, HJC, Shuberth, Nolan, Shark, Shoei and others flip-fronts, and all did not pass muster for one reason or the other. The latest Shoei is definitely the nicest and tempting but I wear eyeglasses and how can Shoei desgin a flip-front you have to take off your eyeglasses in order to put it on and take it off!!!!!!!!!

-
I was told by Yamaha customer service on 2016-09-12 that two Kit 1 CCT (one presumably is for my FJ-09) were being shipped this week...
Note that there are two different CCT kits for different production years of the bike. Everyone that I've seen that reporting having the repair done has a kit #1 bike. I haven't heard of anyone with kit #2 getting their bike done and my dealer is also saying the part is on backorder until late September.Does anyone out there who has received the CCT recall and gotten it repaired give me an idea of how long it took for your dealer to get the parts? I think I'm getting the run-around. I first spoke to my dealer about it about a month ago and his story is that the parts are still back-ordered. Anyone else experience this and if so, how long did you have to wait?
-
I'm not a fan of "beaks" and if there is a close coupled fender already, unless the beak adds positive (beneficial) down force at speed without any negative effects (including from side wind), simply adding one for looks is illogical. Function over form.
-
What is "SB"?At 1700 miles, mine ('15 bought this summer) is in the shop to have the SB completed for the second time. Currently it is waiting on parts but the shop made no mention of a back order, and only called them in 4-5 days ago.
If you can find out if your CCT is in fact back-ordered and for how long and post back on it, I'd very much appreciate. I don't unfortunately trust my dealer (or any for that matter).
-
Went in last week to my stealership after when first took delivery they said Yamaha will not to the TSB replacement until it makes nose, which now it does but the part is back ordered. Today they called and said it was back ordered for my 2015 until November 22 but maybe sooner!
Does anyone know if they're feeding me a line about the 2.5 month back order? Anyone get one installed recently?
Last I saw was August 15 but don't know if it which of the 2 different types of CCT.
-
The bottom line here I believe is that this throttle tube will NOT work for OEM and other aftermarket heated grip users where the grip is bonded to a replacement throttle tube!
It may be interesting to modify the heated grip throttle tube to match the Tamer using the original OEM tube as a practice piece but cutting the plastic accurately and smoothly would be very difficult.
One advantage of NOT installing the Yamaha heated grips.
-
"That's the guy, Kevtex. He's in AU, and does nice work. It works great. And he has much more details than I wrote up, but pretty much the same thing.
A side benefit to the power is better fuel economy too."
Kev's kit's function does richen the AFR on closed-loop but it is the reduction in the variation between the AFR on Closed-Loop and Open-Loop that cause the hunting back and forth that is commonly referred to as "surging" and this thread titles "sputtering". I just installed Kev's O2 Controller yesterday and unexpectedly found time for a 2 hour test ride today. The surging on constant throttle, particularly in the lower gears, is very much improved if not altogether eliminated; although temperatures were cooler today (under 80 degrees F). More test rides are needed but my fuel efficiency was down a bit; although I was enjoying the new found smoothness and consistency.
http://www.ebay.com/itm/142053155148?rmvSB=true
http://fj-09.org/thread/3953/fitting-kev-mod-o2-controller
-
Just for clarity, this is in addition to the factory knobs, not a replacement. You have to drill holes for this, the pictures show the high position.The windscreen bracket movement was bugging me, so I put a bicycle quick release axle bolt in the windscreen mount, which completely stabilizes it. The QR bolt was around $9 for two. I also have four short ones for bolting things to the rear rack without tools.
Drilled a 5mm hole in each side of the mount, and the axle bolt goes right through.

Shown with the screen at highest setting.
Left side, Right side.[span] [/span][span] [/span][span] [/span][span] [/span][span] [/span][span] [/span]


The screen is now rock solid.
To use this instead of the knobs, the factory mount has nuts welded to it on the inside which may have to be drilled, if they are 5mm or less.
Sunny,
Just to clarify, you "drilled a 5mm hole in each side of the mount" which are hidden in your photos; could you post photos without the QD axle installed. It would appear that in the lowest position the QD axle would interfere with the OEM adjustment knobs, and thus the low position cannot be utilized. Is this correct, and if not could you explain how and show in more photos how it all works in each position please? Also, did you not utilize the QD axles serrated clamp rings and if you removed them, how? I would presume when you do change the shield positions you need only flip the QD axle clamp lever, loosen the OEM knobs, re-position the shield, and flip the QD axle clamp lever back to tighten the axle, correct?
Thanks
-
Could you provide mfgr data on "European made Yamaha adjustable risers" and source(s)? ThxStreet Naked works the best, I also added European made Yamaha adjustable risers set all the way back and still kept stock wires, brake line, and clutch cable in place. Much more comfortable.
-
Boy your'e speedy.
This is what I saw on YouTube (
) a mount with a RAM ball on the top edge of a thin metal plate that sandwiches between the 4 screen bracket screws, by Cosmo Moto Accessrories' (new 3 mm thick plate version)
Also, it sounds like the KTM handguards keep clear of the OEM screen. I have the Givi screen which is not contacted by the OEM handguards, so can I presume (not assume) the KTM units will also clear it?
-
Beautiful, thanks, just what I needed to see! And on the fastest color FJ no less...
BTW, I'm interested in your GPS mount (and what model it is, as I read the Garmin Zumo 590 will not follow routes downloaded into it). As I saw on YouTube (
) a mount with a RAM ball on the top edge of a thin metal plate that sandwiches between the 4 screen bracket screws; is that what you have, if so who makes it (Cosmo Moto Accessrories' new 3 mm thick plate version) and can you post photos of it)?
Thanks again.
-
Can one of you who have the KTM handguards post here a photo down on the bars that shows the inboard clamps in relation to the handlebar control posd please by tomorrow night?
Power Outlet
in FJ-09 Tracer 900 General Discussions
Posted
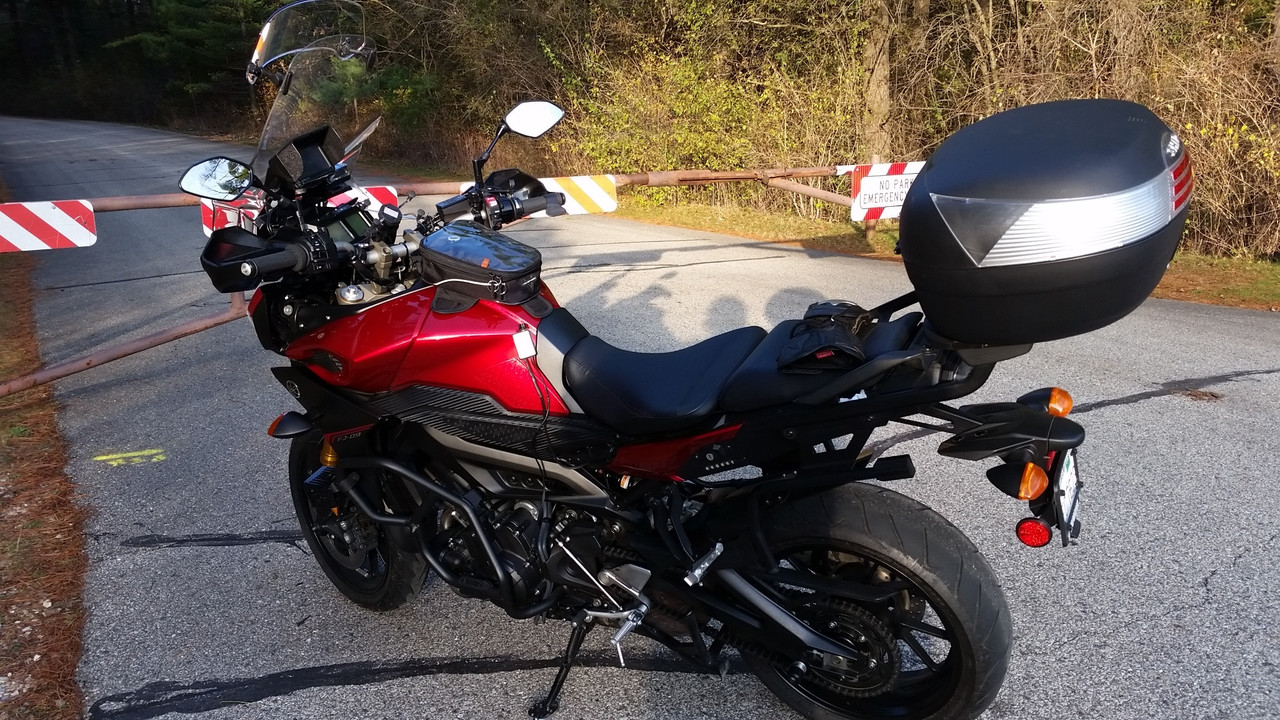
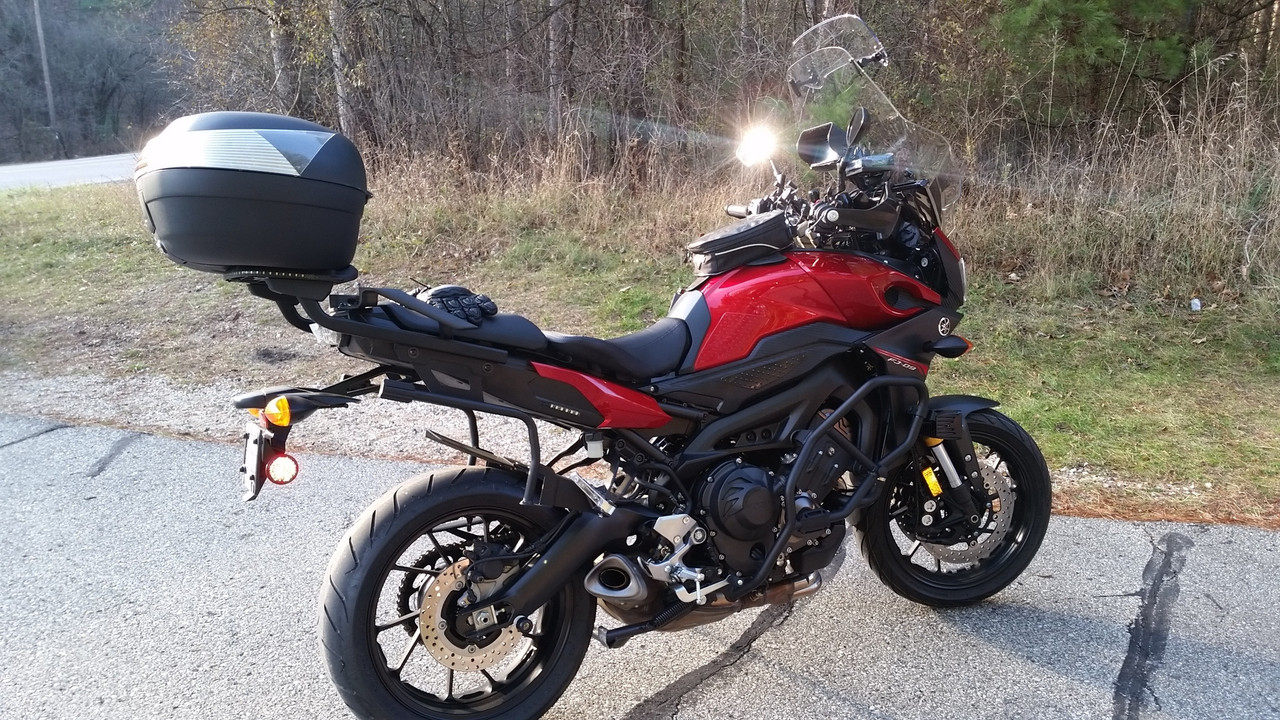
In the right side OEM hole (which had to be enlarged slightly with a Dremel drum sander) for I installed a dual USB power port (2.1 amps output per port) that has an fairly accurate LED volt meter between the ports (the rubber weather cover has a rectangular hole in it so the volt meter can be seen with the cover plugged in but I added some black tape to act as a rain visor above this hole just in case). The OEM connectors behind the wind shield power for the USB and a separate 5 volt circuit that serves the RAM X-mount for the cell phone.
For my heated jacket/vest/gloves/tire pump, etc I installed a coaxial power jack with an inline fuse AND a standard SAE power plug for the Battery Tender and any other device powered by an SAE plug about where Redfjniner has his plug hanging out. On tour I carry a Anti-Gravity PPS XP-1 lithium battery kit along with a mini electric tire pump (plus a C02 filler kit and a dozen plus cartridges along with two plug kits, that way I'll knock on plastic, never need them all).